Wednesday, May 25, 2011

Day 10: smell the roses...


Ever been on a tour of a septic sewer system? Quite delightful, let me tell you. Here at Lotan, their sewer system consists of septic tanks and constructed wetlands, which are both environmentally friendly and harness the power of nature to breakdown contaminants.

Constructed wetlands are super awesome – basically man's version of a marsh or swamp, which act as an amazing natural filter for wastewater. Here's a diagram:

 Basically what happens is wastewater flows in and percolates through a series of rocks, gravel, and hydroponic plants (water plants). These components produce micro-organisms that feed off of the contaminated water, breaking it down and removing the pollutants. By the time the water reaches the end, it's clean! Pretty cool stuff, that whole nature thing. From there, you can either pump the clean water to your garden or another wetland, depending on what you prefer. 
A diagram of a horizontal subsurface flow constructed wetland system. It starts on the right with the person, ends on the left with the tree! (Click picture to enlarge)

Learning about the constructed wetland!

Constructed wetland 


Tuesday, May 24, 2011

Day 9: plant love

Plant propagation is the process of creating new plants. Every plant reproduces in 2 ways: sexually and asexuality. Here's the deal:

Sexual Propagation
Asexual/Vegetative Propagation
  • Reproduction through seeds, which allows for 2 things:
    • genetic diversity
    • plants to adapt/evolve to particular climate
  • Most fruits and flowers reproduce sexually
  • Reproduction without seeds, creating plant exactly like the parent plant
  • Also referred to as Vegetative Propagation, because vegetables produce in this way
  • Different types of vegetative propagation, including grafting, budding, cuttings, and many more

We learned about all the different ways vegetative propagation occurs, including cuttings, grafting, and budding. Cutting involves cutting a part of the parent plant, then planting it in soil. When the severed piece of the parent plant is planted in soil, it sprouts roots from the nodes, the part of the stem from which leaves, branches, and/or flowers normally grow. Once planted, the plant regenerates itself, forming a whole new plant.
Cutting sweet potato stems. It's ideal to use clippers or a knife, as this reduces damage to the plant.

Rule of Thumb: cut at every 6 nodes, which is about the length of the starter pots.
Planting cut sweet potatoes in starter pots. Yay for propagation!

I also want to share a wonderful sentence spoken by a participant of the Green Apprenticeship program when talking about permaculture. Along with sustainability and permaculture, I think it applies to just about any endeavor in life: "It's not an intellectual process, it's an experimental process."

Monday, May 23, 2011

Day 8: everyone needs "sun" love...

Sun (n.): the star that is the central body of the solar system, around which the planets revolve and from which they receive light and heat; a self-luminous heavenly body that radiates energy, especially heat and light. (thank you, dictionary.com)

Solar energy is hot, literally – solar panels, heaters, dehydrators, water heaters, the list is endless. Utilizing it in order to cook food though? Ohhh baby, you betcha :)

I've mentioned solar ovens in a few of my posts, but not the nitty-gritty details. Here's why they're hot:
  1. Utilizing solar ovens saves forests, animals, our lungs, energy and electricity bills, and just about everything else on this planet.
  2. They're super easy to make, and a great way to recycle cardboard, aluminum, mirrors, baskets, coolers, old clothes, paper, grass, straw, wood, trunks, pizza boxes...the list goes on and on!
  3. Because you can get real creative with them, it's a GREAT project for the family, schools, and CAMPS (cough, cough).
  4. SUN=FREE SOURCE OF ENERGY
  5. Food cooked in solar ovens tastes better – because of the slow-cooking process, nutrients are not zapped and the food retains most of it's natural flavor.
  6. Because you have to follow the sun in order to properly cook food, you become more connected to nature and the natural rhythm of the day.
Among these major reasons, solar ovens are making a huge impact in impoverished countries. Check out this incredible video:

So how do they work? Basically like a slow-cooker or crock pot, but through the principal of the greenhouse effect: sunlight is converted into heat energy, which is then used for cooking. A clear sky is required, but in certain climates solar ovens can be used on a cloudy day, as long as the food is put out early and there is overall more sun than not. Cooking food in dark pots and pans is most ideal because dark surfaces trap heat, whereas light colored surfaces don't. By reflecting extra sunlight onto one or more shiny surfaces of the pot, the heat potential is increased. Mirrors, aluminum foil, mirror-finish metals, and other shiny materials have all been used successfully for solar cooking, depending on the type of cooker and the environment in which it's used.

There are many kinds of solar ovens. Here's a few pictures from www.solarcooking.org, an NGO dedicated to spreading solar cooking awareness and skills worldwide. Their website contains a vast amount of information on solar ovens, from solar cooking basics to how to build your own!
Panel style cooker, dubbed the "Cookit"

Box-style cookers, much like the ones found here on Lotan
 What I find empowering about harnessing the Sun's energy is it's humbling simplicity – as technology becomes more advanced and the generations less in touch with the natural rhythms of the earth, we're finding ways to reconnect with nature and it's amazing gifts.


Saturday, May 21, 2011

Days 6 & 7: a recap


Parabolic Oven

Solar Oven

Mud Master Jessi!

Repairing the mud bench

Band from the local cultural event


Mulching the Garden and a side view of the covered garden
In spirit of Shabbat, I've decided to post pictures summarizing my first week here at Lotan, from my first day up till my garden days. Shabbat is a time of reflection and rest, which I am gladly taking part in.
It's very rewarding working all day because you start to appreciate life's necessities - water, food, sleep, and people - more. I slept 10 hours straight last night, and probably could have slept longer if I didn't wake up to my stomach growling.
Tomorrow is the start to another week of working, learning, and living. And as necessary and relaxing as this Shabbat has been, I'm ready to get my hands dirty again :)

Friday, May 20, 2011

Day 5: playing in the garden


Everyone was pretty exhausted from the festival last night, considering we didn't get home till after 11 – our days begin at 6 AM, so anything later than 10:30 is witching hour. We spent the day lazily playing in the garden, weeding and harvesting.
We up-rooted dying plants, including alf-alfa sprouts, fennel, and invasive weeds and trees, creating mulch beds with these plants. All you do is pull them up, then place them on areas that need a little bit of soil lovin' AKA moisture and nutrients. When placed on-top of beds, the plants prevent the soil from drying out and will eventually compost back into the ground. This can be exhausting work, as some roots are quite stubborn and there is a lot of getting up and down. Stretching before and after is highly recommended.
After weeding and mulching, we collected dried chard seeds from dying chard plants to store for the next planting season as well as for future seed-ball activities. Summer time is here, which means that most of the plants here at Lotan will die, sadly enough. It's just way too hot for anything to really flourish here. So after collecting the seeds, we pulled the dying chard up, then placed it back on the ground in order for it to de-compost and give back to the earth. This took quite sometime because there were many plants and many beds to cover. I was finally able to break in my gardening clippers and wowzers, those babies are good!
Dying chard
Chard seeds
We then moved on to working in the covered beds, which was a whole lot cooler, literally. There is a light black tarp over these beds, creating cooler air and a more moist climate. In theory, this climate is conducive for a longer growing/harvesting season and from what I can tell, it works. The plants in this tunnel of coolness seem more alive – greener, fresher, and smell like life. Delicious :)
We harvested 2 kinds of greens, tat soi and mizuna, both in the mustard family. One of my favorite things about working in the garden is if you're feeling a little hungry, it's munch heaven. Needless to say, my roommate and I had a small feast of fresh, leafy green veggies :)
Now we could only harvest a few of these veggies, due to the fact that the rest of the batch was attacked by a parasite that leached itself on the plants like a spider web. It's a parasite that instead of growing out of the ground, somehow sprouts directly onto the plant, jumping from stem to stem, creating a web. When this parasite attacks, the only thing to do is up-root the plants. Sad day, especially if the plants are beautiful and yummy.
We ended the day early, enjoyed a fabulous lunch, then ventured into experimenting with the solar and tabun ovens. Solar ovens utilize mirrors to reflect sunlight onto what you're cooking, whereas a tabun is a thick, clay oven that encapsulates heat in its walls. Dinner is not served on Thursday nights, so the Bustan residents put together a potluck, making all sorts of dishes, mostly utilizing fresh produce and herbs from the garden. I decided to make the fabulous banana cookies :)
The procedure with the solar ovens is as follows:
  1. Anything going in the solar oven must have ventilation on the bottom. Here, the residents place sticks on the bottom of the oven and place whatever they're cooking on top of it.
  2. Place the tray in the oven. Line up the side of the oven with the shadow from the sun. This way, you know the sun is directly shining on the food.
  3. Maneuver the mirror to where the reflection covers most of the food.
  4. Continually check on the oven to make sure it's directly lined with the sun, as well as keeping an eye on the food. From there, you just wait!
The procedure with the tabun is a little different, as it is more closely related to an actual oven. Here's how it works:
  1. Create a fire inside the oven, much like a fire you would create at summer camp for making s'mores :)
  2. Let the fire burn down. This can take up to 20 minutes, so start this early!
  3. After the fire has burned down, move the coals around to make a flat surface. You can even place 2 cold bricks with a rack on-top, creating a level surface to place the food tray.
  4. Place the tray with food in the oven, and close the door.
Both ovens produce quite delicious results, I would say more so than regular ovens. Because of the heating process, the outside of the cookies turned out a little crunchy, whereas the insides were nice and soft. Yummmm :)
Tabun oven is on the far right-great for making breads and baking!
The main difference between these ovens and a regular oven is the cooking time – in the solar ovens, it can take anywhere from 10 or 15 minutes to an hour or two to cook something. For the cookies, it took about 30 to 45 minutes, but probably would have taken less time if I hadn’t of kept checking on them.
The potluck was delicious – all kinda of dishes with fresh veggies from the garden, salads, grain dishes, and yummy yummy banana cookies!
So everyone has Friday and Saturday off for Shabbat. I'm really looking forward to sleeping and taking it easy. Some rest is very needed :) Shabbat Shalom!

Day 4: intentional mud-building


Today was mud-building day, AKA all kinds of messy! We started making mud in the morning, using an industrial sized mud-making machine the Lotanites converted from an old cement making machine. We did that all morning, filling 2 huge boxes. It was hard work – required lots of shoveling and lifting buckets of silt, water, straw and sand into the mixing machine. Everyone took turns between shoveling, lifting, and being the “mixing master,” the person in charge of putting the right amount of each ingredient into the machine.
We went to breakfast early, where I enjoyed a lovely piece (or 2) of freshly sliced bread with olive oil, lemon juice, and zatar, as well as a full plate of veggies and a hard boiled egg. The breakfasts here are basically the same thing everyday, so requires a little bit of creativity to change it up a bit. My zatar toast was the creation of the morning :)
After breakfast, we spent the rest of the day “refurbishing” a mud bench that was ruined by rain. The initial structure was ruined because the builders did not put on a final coat of oil, essential to any mud structure to prevent water damage. The bench wasn't looking too good – huge pieces falling off, cracks, flaking..it had definitely been through quite a bit of water damage.
So we took the huge boxes of mud from the morning and got our hands real dirty repairing it. There were 5 main steps:
  1. remove any broken pieces and sweep up misplaced dirt
  2. take a sponge and wet the area you are working with – this is ESSENTIAL before ANY type of mud-building, as it acts as a buffer for the mud. Very very important!
  3. take a bucket of the mud-mixture and add a little bit of water, making it more liquid and “sauce” like
  4. cover the bench in this solution
  5. take another bucket of the regular mud-mixture and plop it on top of the layer from #3, then either using your hands or a tool that I cannot remember the name of, flatten out this layer so there are no air bubbles. This layer is the final layer before smothering on the protective oil.
We didn't start from scratch, so the tips above are only for REPAIRING mud-structures. I'm not exactly sure how you build them from scratch, but hopefully I will soon :)
That evening, there was a local event with people from different kibbutzim around the region. It was all about sustainability and eco-living, as most of the kibbutzim in this area are geared towards just that. It started off with a moon-lit hike, which is something everyone should do at-least once in their life – the Negev is one of the most amazing places to be at night, a blanket full of stars, massive mountains, and a soft breeze snuggling your entire body. After the hike, everyone went to a cafe-like area and split off into discussion groups. The subject was religion and the environment – do they go together? If so, how? If not, why? Very interesting perspectives, considering the diversity of the group – Israeli, American, English, Australian, Italian – all over the world.
But despite this diversity, everyone pretty much agreed that Judaism goes beyond just praying and being “religious.” Reform Judiasm IS sustainability. Furthermore, whether you consider yourself a religious jew, a spiritual jew, an I-don't-know-jew, or not a jew, there is one thing that is ubiquitous for every person inhabiting this earth: we are required to sustain it, just as it sustains us. It's a symbiotic relationship, meaning that both systems entirely depend on each other for survival. It's about being consciously aware of your actions. Every action has a reaction, every thought a consequence. I believe the first step for rendering a conscious mind is in setting intention – tuning in to the present moment with attention and asking yourself the question: “why am I here?” The answer could be anything – to develop a certain trait, for another person, to give back, to learn, to rest your mind – just something that resonates with you; something that motivates you to be right there, in that moment. Putting an intention on your action – this is where conscious living begins. This is where sustainability, for the earth, others, and yourself, begins.

Tuesday, May 17, 2011

Day 3: hello, dirty fingernails...


So when my alarm went off this morning at 5:30, I was ready to go – what up morning celebration?! Let's stretch! It was a cloudy day, so not too hot. Great gardening weather, which was exactly what today was all about :)
I spent my morning working in the garden, fighting an invasive vine that was getting a little too close to other gardens and hoarding the water from the other plants and trees. Nasty little fellow, this vine – roots itself deep in the ground, creating quite a challenge to get ride of. Lucky for us, it was all over the mint and basil. Mojitos and pizza anyone?
Invasive plants can wreck havoc on your garden, especially if you don't catch them in time. Invasive plants compete with other species for water, nutrients, sunlight, and space. As a result, invasive species can:
  • Displace native species
  • Reduce plant diversity
  • Alter ecosystem processes
  • Hybridize with native plants, changing their genetic makeup
  • Destroy the habitats that support native animals, insects, and micro-organisms
  • Create ecosystems that support aggressive, non-native plants, animals, and pathogens
(www.mortonarb.com)
Not only was this monster in the basil and mint, we also discovered it by chard, amaranth, and fig trees. FIG TREES?! I almost cried when I was told they're not ready till about June or July. How delicious would a fresh picked fig be? Gah.
Also, whose ever seen amaranth growing? It's absolutely gorgeous, resembling a purple version of a blue bonnet.
Purple loveliness!
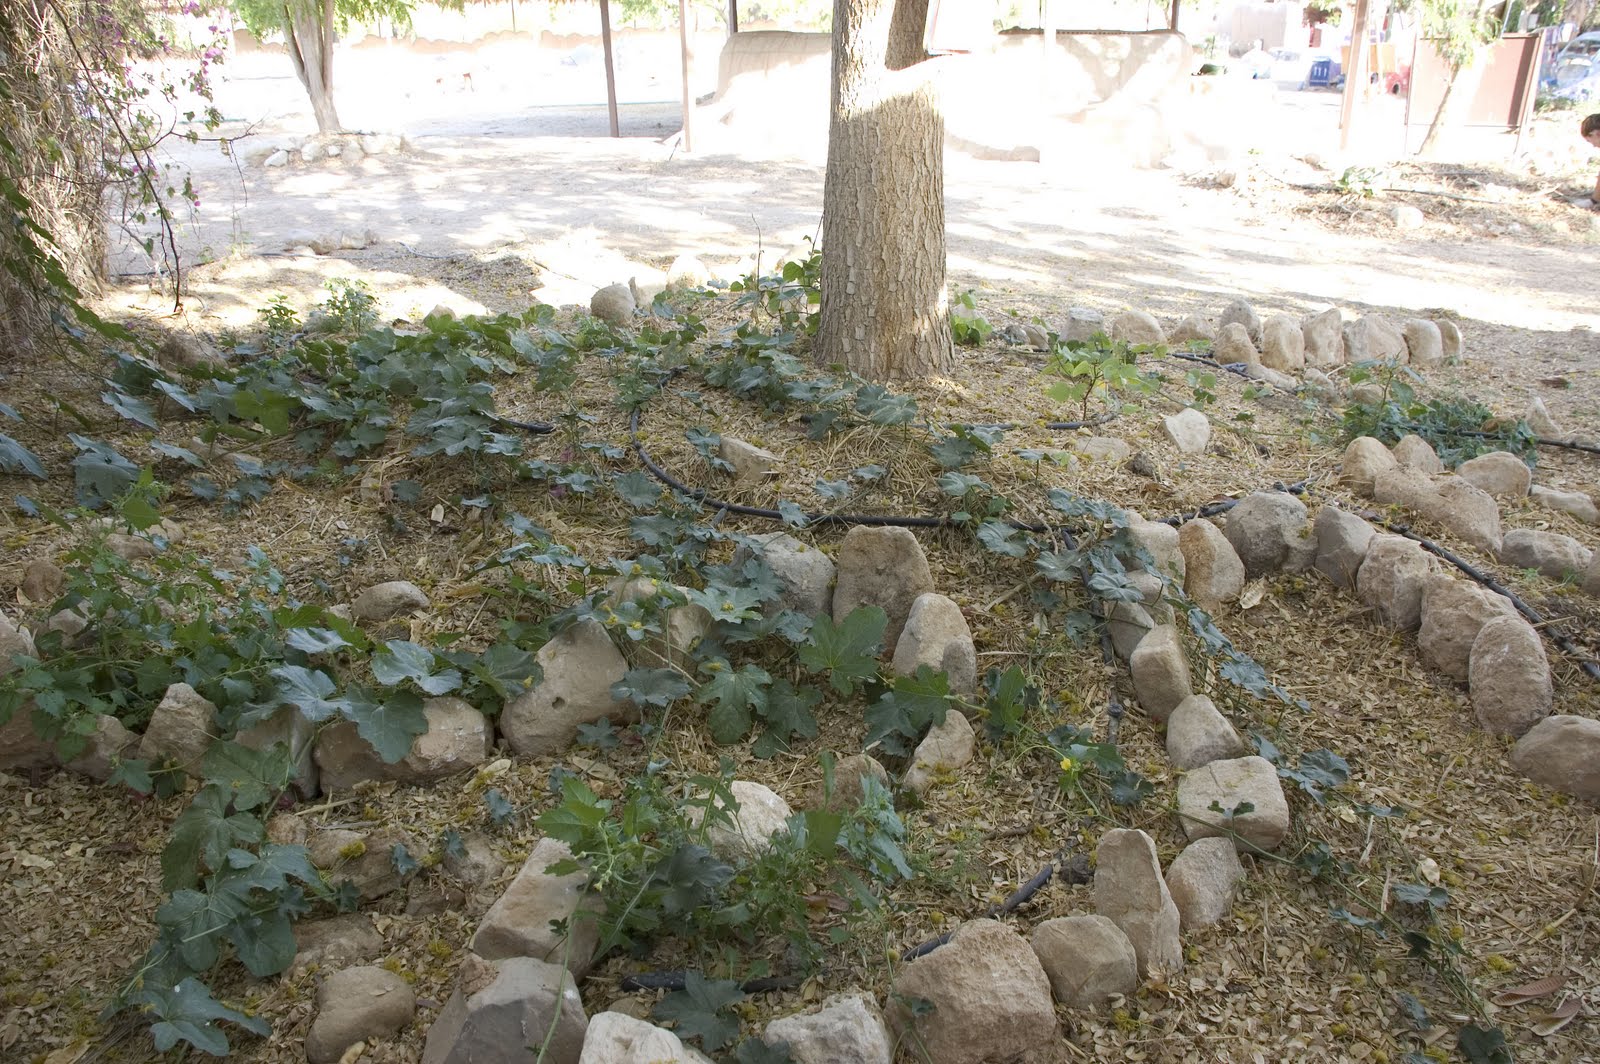
 So after we battled the bad guy, we moved onto cleaning up a spiral garden that once was the home to tomatoes. This garden was different than your stereotypical spiral garden – instead winding its way from the base into the center upwards, the entire garden was on the ground, in a spiral shape. It was also constructed on raised beds, which, according to good 'ole wikipedia, produce a variety of benefits: they extend the planting season, they reduce the need to use poor native soil, and they can reduce weeds if designed properly. Also, walking on the raised beds should be avoided, because it allows the soil to breathe and the roots have an easier time growing. We re-packed the soil (which was actually manure...smelled great), creating an indention through the middle in order for the drip irrigation to adequately reach everything. We then covered it with dying plants/vegetables, which keeps the soil moist and healthy. The next step is planting the tomato seeds! According to Yotam, our garden guru, the best way to plant tomatoes are to squeeze the seeds right into the beds. When it's not tomato season though, you squeeze the seeds into a jar or cup and let them sit for just a few days, then rinse them out with water and dry them overnight. Viola! Ready to go tomato seeds!
The weeding and re-spiraling took all morning, and we were all pretty exhausted once lunch time rolled around. The meals here are pretty standard for Israel, zatar and hummus being the staples. The kibbutz also does “meatless mondays” and actually only serve meat for lunch, which is not only ecologically friendly, it's also economically friendly.
So I'm pretty exhausted and am loving the fact that it's not even 10 o'clock and I'm heading to bed soon. Sleep here is definitely well earned, and such a great reward at the end of the day :)